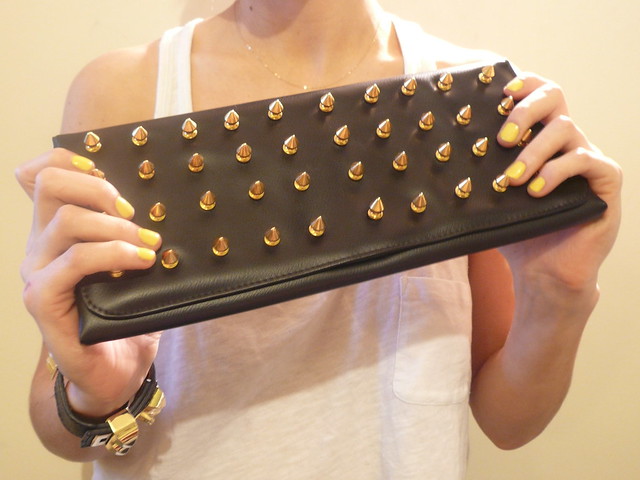
DEAD EASY THIS
GET:
1.A PLAIN CLUTCH BAG (CHARITY SHOPS ARE IDEAL)
2.SCREW BACK SPIKES, I GOT MINE OFF
THIS GUY
3.DRILL
4.RULER
5.COMPASS OR SOMETHING SHARP TO MARK THE BAG
-USE THE RULER TO LINE UP THE SPIKES OR CREATE YOUR PATTERN, TAKE YOUR TIME, YOU WANT THEM TO BE STRAIGHT.
-TAKE THE COMPASS OR SHARP THING AND MARK THE BAG UNDER WHERE YOU HAVE PLACED THE STUDS, GIVE IT A GOOD STAB 'CAUSE YOU WANT TO BE ABLE TO SEE THE MARK, DON'T STAB YOURSELF. THIS TAKES A WHILE SO BE PATIENT.
-DRILL HOLES THROUGH THE BAG WHERE YOU HAVE MADE YOUR MARKS, MAKE SURE YOU ARE DRILLING ONTO A SURFACE YOU DON'T CARE ABOUT, SO NOT YOUR PARENTS KITCHEN TABLE. I USED AN OLD BOOK TO REST ON. (ITS BETTER IF THE DRILL HOLES ARE SMALLER THAN THE SPIKE SCREW, YOU DONT WANT THE HOLES TO BE TOO BIG)
-PUSH THE BACKS OF THE SPIKES THROUGH THE HOLES, I HAD TO USE A BIT OF FORCE, AND I ALSO USED NAIL SCISSORS TO WIDEN THE HOLES FROM THE OTHER SIDE.
I DID TAKE PHOTOS TO GO WITH THIS DIY BUT I THOUGHT IT WAS PRETTY STRAIGHT FORWARD AND THEY WEREN'T NEEDED. ALSO I FEEL REALLY ILL TONIGHT AND I WAS GETTING REALLY STRESSED OUT TRYING TO MAKE THE PHOTOS GO WHERE I WANT THEM HAHA! BUT I REALLY WANTED TO PUT THIS FIRST POST UP ANYWAY SO HERE 'TIS.


